
I cut my recording teeth on analog equipment through the 90s.
I loved the big mixing boards, the patch bays, the effects racks, and trying to get your songs perfectly placed on 15 minutes-to-a-side cassette tape. I started collecting music from the tail end of the vinyl era, through to the cassette and CD era, and got sidetracked by life well before the streaming era.
All the home, church, and university recording I did went straight to tape. And that was really the only recording medium I gained any real skills in.
Fast forward to late 2023 when I decided to start exploring digital recording more seriously. As I began to look deeper into building a digital home studio, the first thing that surprised me was how little space was required. Where was the massive 40-track mixing boards? Where were the numerous patch bays and the rat’s nest of patch cords? And where did the effects units go?
After spending several weeks researching and trying to catch up on a couple decades-worth of missed technological advancement, I quickly learned that digital recording had distilled everything down into a laptop-sized workstation that housed almost everything required to produce pretty decent recordings. In fact, I was shocked to read how many award-winning artists were recording and producing in home recording studios.
Armed with my research, I set out to building a decent home studio in an under-utilized part of the house. I was open to anything, but had a few guidelines; I wanted to stay within a budget under $5,000, do minimal renovations, put it together relatively quickly, and have decent enough equipment to produce broadcast-quality recordings.
Okay, so with all of that criteria, here was the ten-step checklist I put together to build out my home studio as well as links to where I found everything:
- Studio Space
- Computer/ External Hard Drive
- Audio Interface
- Studio Monitors
- DAW
- Microphones & Pop Filter
- Headphones
- MIDI Keyboard
- Cables and Mic Stands
- Room Treatment
__________________________________________________________________________
1. Studio Space
Cost: $0

We had a catch-all room in the house which had shelving containing everything from Christmas decorations to winter clothing, acted as a home office/work station, and had a family’s worth of unwanted and outgrown shoes. I tore out the shelves, moved out the boxes and décor, and gave the shoes to charity.
The room was perfect as the ceiling was over 8 feet high, and the room was rectangular at 8 feet x 14 feet. Square rooms that have symmetrical walls cancel out certain frequencies and mess with sound waves.
I patched up the holes and re-painted the room a soft, relaxing off-white. I put up a large bookcase at the far end of the room, where I put my vinyl collection and the books that inspire me. I hung my favorite art pieces and basically made a space that I would want to spend a lot of time in.
2. Computer/Laptop
Cost: $2,500
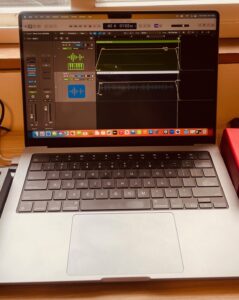
Even though I had only ever used PCs and had limited experience with Apple products, I decided to go with a MacBook. I knew it would be a steeper learning curve since I’m not even a big fan of laptops, but I wanted the portability of a laptop so I could be a little more mobile, plus I had learned that Mac was quite a bit more compatible with recording software.
Considering everything your laptop needs to do, it wasn’t surprising that this became the single most expensive piece of the studio.
I ended up getting a MacBook Pro with 16GB of memory and 1TB of storage. It is super light, and easy to operate. Super happy with this buy so far!
I ended up also purchasing a mouse as I had trouble getting used to the pad on the laptop. I wanted the feel and movement of a mouse.
Once my laptop arrived and I started experimenting, I added a couple other little goodies as well; an external hard drive to store my finished recordings, and a multi-port USB hub, since the laptop didn’t have quite enough ports for everything I wanted to plug in.
- Laptop: https://amzn.to/42GiSuO
- Hard Drive: https://amzn.to/4hLUGLN
- USB Hub: https://amzn.to/3WPfSIV
- External Mouse: https://amzn.to/4hfgXC1
3. Audio Interface
Cost: $150
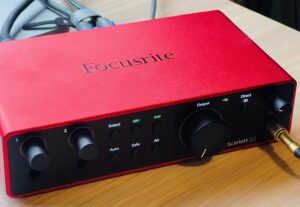
When it came to getting an audio interface, I was still a little uncertain after my research, and so I sought out the advice of a more-qualified friend. He recommended the Scarlett 2i2 Audio Interface.
While I’m not exactly qualified to say if I purchased the best one for my purposes, I can report that I am really happy with how user-friendly and versatile it is. Plus it puts out some high-quality signal. It prevents clipping, and intuitively sets the perfect level for mic or line-in.
Also it’s totally plug and play so I was pretty happy to not have to learn another new piece of equipment on top of everything else I had to learn.
- Interface: https://amzn.to/4hnzsEt
4. Studio Monitors
Cost: $800
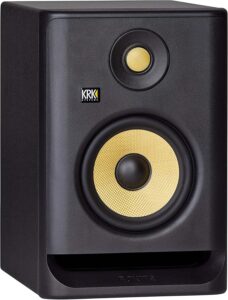
This is the one piece that I knew something about. Studio monitors were a core piece of equipment for me back in the day, and while the technology has changed some, I felt a little qualified to find a good set.
After a little shopping around, I ended up buying these amazing powered speakers. Not only do they look cool they sound great. These are powered speakers and have 25 settings to help EQ the acoustic environment of our studio.
They look super sharp and are super clear and crisp.
I also bought a couple stands so that I could place the speakers right at ear level as I sit at my desk in front of my DAW.
- Speakers: https://amzn.to/42JvzFk
- Stands: https://amzn.to/3WMcL4u
5. DAW/Digital Audio Workstation
Cost: $200
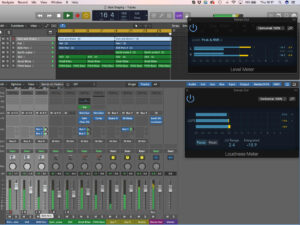
DAW, I quickly learned, stands for Digital Audio Workstation. This is the software that is used for digital recording. Consider it your virtual mixing board. You use it to record, edit and mix.
There are a variety of DAWs out there, but the two main players are Pro Tools and Logic.
After doing a ton of reading and re-reading, I ended up going with Logic Pro X. Not only did it seem everyone was using this as their favorite DAW, it seemed to be the most compatible with a MacBook.
Once I had set up my MacBook it was a snap buying the Logic Pro through the Apple Store.
- Logic Pro X: https://www.apple.com/ca/logic-pro/
6. Microphones
Cost: $500
I knew a fair bit about microphones already, but I did some additional research to make sure that things hadn’t changed dramatically since I had used mics. Thankfully, the industry had stayed the course and the microphones I knew well were still being used in the industry.
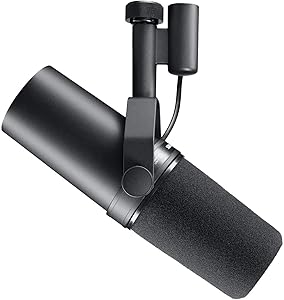
I thought I would start out with one hard-working mic that could handle vocals, acoustic instruments, and anything else that came up. I ended up with the Shure SM7B just as an overall workhorse to start out with. Plus it has such a cool podcast vibe to it I couldn’t pass it up.
Like everything else, I will probably end up collecting a few more mics for specialized recording, but for now, I feel like I have some great recording versatility at my fingertips with the SM7B.
Although I am not doing a ton of vocal recording, I also got a pop filter. This reduces the “pop” you hear when someone speaks into a microphone.
7. Headphones
Cost: $450
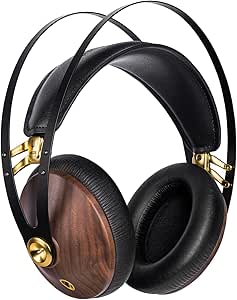
Headphones are so key to good recording and mixing that I decided I would shop around for the very best I could afford. I ended up with this sick headset from Meze Audio and I have been super pleased with the quality of these headphones. When they arrived they passed the cool-o-meter from my teenage son.
Everything about these headphones are amazing – they are the sort of thing you bequeath to your descendants in your will. They are made of walnut wood casing, with super soft ear pads, and a spring steel headband.
The other attention to detail item I like is that the wiring can unplug from each headphone, which means you aren’t screwed when the cord crimps or shears off when you run over the cord with the wheels from your office chair.
This was the one items I was the most excited about. I have gotten a ton of compliments over these super-sharp headphones. The sound is incredible, and as closed-back headphones, I can hear both myself and the backing tracks at the same time.
- Headphones: https://amzn.to/4jHQs9X
8. MIDI Keyboard
Cost: $150
Technically, if you have a microphone, you don’t really need a MIDI keyboard, but so much of the music samples and sounds in modern recording these days rely on MIDI, that I thought I would pick one up as well. Also, they are so relatively inexpensive that I wasn’t really breaking the bank by adding one on.
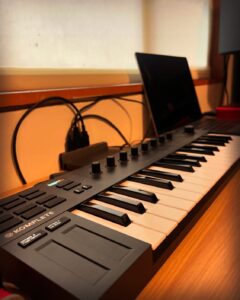
I didn’t want to take up a ton of space on my desk, so I ended up with a 32 key keyboard that gave me just enough space to play using both hands.
Native Instruments seems to have this bit of the industry tied up so I was happy to go with the Komplete Kontrol M32. It was plug and play straight out of the box and so far I love its simplicity and ease of use.
- Keyboard: https://amzn.to/3WMk6kK
9. Cables and Stands
Cost: $200
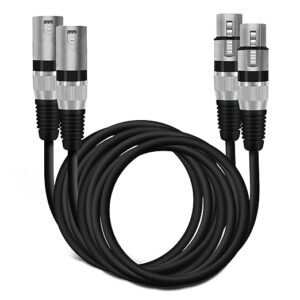
For some reason, I ended up having way more fun shopping for cables than I should have. Maybe I don’t get out enough.
In any event, I had a lot of fun loading up on mic stands, instrument cables, and mic cables. And they were surprisingly cheap.
The idea was to go best quality for best price. I feel like I did fairly well with the various patch cords, cables, and mic stands.
- Cables: https://amzn.to/3CDz5Xa
10. Room Treatment
Cost: TBD
I ended up putting this step last because I still haven’t done it. The room I chose is pretty quiet to begin with and I am not planning on doing a ton of vocal work right off the bat. Plus, I want to work with the room a bit first, before isolating the problem areas, like walls that are reflecting too much sound, or screwing up frequencies.
When I do start treating any problem walls, I will likely be buying these squares to help deaden the room and also provide additional sound-proofing from outside. So you don’t hear the neighborhood dogs, birds, and random street noise.
- Room Treatment: https://amzn.to/3ElDZJ1
Final Thoughts
Overall, I’m pretty happy with how the home studio has worked out. Learning to record digitally has been a steep learning curve and the first few recordings have not quite been at the quality I know my equipment can produce. But I am committed to doing the reps and slowly learning my DAW.
At the very least, I’ve had fun, stayed within budget, and created a magical space where I can unleash a little creativity.
When the dust settled, literally and figuratively, I ended up spending just under $5,000. So I just snuck under the budget. All in all, however, I am pretty happy with the results and feel like I got the quality I was looking for.
Now to get in there and start recording.